Friday, March 31, 2006

The Day the Clown Cried

I'll come out and just say it. I try not to hide anything from anybody in this blog....so here it goes. I'm a Jerry Lewis fan.
There.
You either get him...or you don't. There's nothing intellectual in "getting"
him, as a lot of the crypto-film-nerds would have you to believe. Surreal comedy is an acquired taste and some people don't see it. Fine.
I don't see what so great about American Idol. And in that comparison, it seems people would rather watch people's dreams crushed by rude no talent hacks, than watch a guy spaz out to just get a laugh.
So...that being said...I've seen just about everything Lewis has ever done. Some, I like more than others, (Nutty Professor, The Errand Boy, Way Way Out, The Bell Boy, The Big Mouth, The Ladies Man, etc.) some I could care less about (The Delicate Delinquent , Hardly Working,...no surprise there...and The Geisha Boy). There is one film that he worked on that I haven't had the pleasure to view. As a matter of fact, only a hand full of people have seen this film.
The Day the Clown Cried. (1972)
I heard about this Lewis film in the early, early 80's, and being the Lewis fan then, I became obsessed with it. I heard it was the most ghastly concept and that Lewis' performance was legendary. Before VHS and before the internet could share data bases and files, I thought that TDCC was a myth...or had died early in the writing. All I was getting years ago was word of mouth. Surely, nothing this insane could have been filmed, edited and screened. If you haven't ever heard of this film, let me fill you in on the story:
It's World War Two (already a bad start) and Lewis plays a German clown named Helmut Doork (!?). He's fallen in the ranks at the great circus and rages on in hopes of being number one again. The problem is he's a mean drunk and a jerk. He goes on a drunken speil at a tavern accusing the great Adolph Hitler and his mad schemes for making his job harder (it's always someone else, eh?). While literally falling down drunk (Jerry Style), he lands at the feet of two Gestapo agents who arrest him for ridiculing their Furher. He's interrogated and gives up names of everyone he knows, anti-Hitler or not, just to save his skin. Not too funny so far.
No belly laughs here.
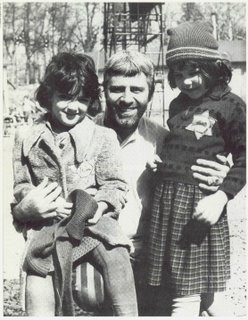
He's taken to a political prison adjacent to a concentration camp where he's tortured and ridiculed all the while signing his own praises as a great clown. When he tries to stand up to his wardens and then beaten down, he criticizes himself for showing any backbone. At one focal point, he's thrown down in the mud and notices the children laughing at him from the concentration camp side. He makes an effort to apply mud to his nose and this makes the children laugh harder. More children gather at the fence who laugh. He then exclaims, "Look....They're laughing at me. I am a great clown!" The children are some sort of catalyst and he works for only them. (This is where art imitates life with Lewis...children in need of a clown) He takes soot from the stove to work up some make up, some bird droppings for the white base, trades some food for a larger man's shoes and coat, and starts really giving the kids some performances.
Can you see it coming? It's kinda' like a hard knot in the back of your throat, huh?
The head Nazi sees how Jerry can handle the kids and is ordered to entertain them for their duration. Eventually they are herded onto a train boxcar and are headed for Auschwitz. To quiet the children and keep them distracted, the Nazis force Jerry to ride on the boxcar as well. He ends up going to Auschwitz with them and then is told to lead them to the gas chambers. The children thinks it's just showers, but
Jerry's character knows differently and yet does nothing. He entertains them to the very chamber door and enters in with them. The door closes
behind them and they're gassed. The End.
WOW!
What a f***king bummer!

The original screenplay was written by publist Joan O'Brien and TV critic Charles Denton as far back as the mid 60's. O'Brien got the genesis for this while working with Emmett Kelly, the lengendary clown...and apparently while reading books on the Holocaust. The idea of the children that were sent to the gas chamber was too horrible to imagine, so the influence of working with Kelly became a natural catalyst for the idea. According to O'Brien, Kelly told her that he wasn't nervous playing to large audiences because he wasn't playing to the grown ups...just the kids.
To make the picture, O'Brien and Denton optioned it to many producers who got the interest of stars like Milton Berle, Dick Van Dyke, and Bobby Darin. Eventually in 1971 a producer, Nathan Wachsberger (Starcrash..They Came to Rob Las Vegas) optioned
on it and took it to Jerry to star and direct. Jerry was a little taken back
at the idea at first..."Why don't you get Sir Laurence Olivier? My bag is comedy...and you're asking me if I'm prepared to deliver helpless kids into a gas chamber. Ho ho...that's some laugh. How do I pull it off?"
Wachsberger assured Jerry that he got funding from French and Swedish backers and they'd be using the Europa Studios in Stockholm (where Bergman shot several of his films). Jerry read over the script and made changes. He felt it was something he needed to do now..it was his time to make serious films. He said then..."What a horror...it must be told." , and later he wrote "I thought (the film) would be a way to show we don't have to tremble and give up in the darkness...Helmut would teach us this lesson."
I think the main reason Lewis did the film was what addicts call being on the "Pink Cloud". He had just kicked a Percodan addiction and was very proud of himself for doing so. Addicts get happy and excited once they kick something and feel rather invincible and start wanting to "pay back" the ones who might have suffered...or give
something to society. These emotions usually run toward grandiose dreams and sometimes are focused toward religious projects. You can thank booze for Mel Gibson's "The Passion of the Christ". Quite a lucrative and well made "Pink Cloud"...but one none the less.
Jerry jumped into the role with gusto and while doing a final rewrite, he went on a grapefruit diet and lost 35-40 pounds to simulate a starved war criminal. Shooting started in Paris, Feb. 1972 and then onto Stockholm in April. According to Lewis, even before shooting started Wachsberger took off to the south of France and the financial backing disappeared with him. Lewis started spending his own money (because "it must be told") to keep the project going, but his funds were at a strain in '72. To make matters worse, Wachsberger never actually paid for the full use of the script, and the option had run out long before shooting started. O'Brien has stated that Lewis knew the option had run out and he was making a movie he had no legal right to make. This cumilation of using his own money (for a projected 1.5 million dollar production) and using a script that wasn't even cleared, put a tremendous strain on him as an actor and director. People on the set, and who saw the edited works later, said the strain shows in his performance. His anger for Wachsberger comes to the surface, as only Jerry could emote.
Jerry saw things differently: "The suffering, the hell I went through with Wachsberger had one advantage. I put all the pain on the screen. If it had been my first picture, the suffering would have destoyed me. But I have the experience to know how to use suffering....I was terrified of directing the last scene. I had been 113 days on the picture, with only three hours of sleep a night. I had been without my family...I was exhausted...beaten. When I thought of doing that scene, I was paralyzed; I couldn't move. I stood there in my clown's costume, with the cameras ready. Suddenly the children were all around me, unmasked, undirected and they clung to my arms and legs, they looked up at me so trustingly. I felt love pouring out of me. I thought, 'This is what my whole life has been leading up to.' I thought what the clown thought. I forgot about trying to direct. I had the cameras turn and I began to walk, with the children clinging to me, singing, into the gas ovens...and the doors closed behind us."
According to a SPY magazine article on TDCC, there was no on set documentation. Not true. Lewis wouldn't shoot a foot of his magnum opus without proof he was sweating blood. I've seen only seconds of this footage, but it does exist.
By June the picture's principal photography had wrapped and Lewis openly voiced his
business dealings with Wachsberger to the Swiss press. On some legal grounds, Wachsberger had his lawyers sue Lewis on breach of contract, siteing that he couldn't finish the film without Lewis' help now. Lewis put his back into it and used his editor Rusty Wiles through the winter and then the spring, to cut a version together. That version is the only one to be seen by the lucky (?) few. Europa Studios have refused to give up the negative claiming that they are stilled owed 600,000 clams. Trying to get it finished, Lewis showed the cut to O'Brien and Denton to get them to renew the option. This was a bad thing. According to Denton later, "It was horrible...In one scene, Jerry is lying in his bunk wearing a pair of brand new shoes after theoretically having been in a concentration camp for four or five years."
From all reports from the people that have seen it, Jerry plays is cold, flat and the humor is so terribly wrong as to be legendary.
Harry Shearer, who saw the rough cut in the 80's, has said," If you say'Jerry Lewis is a clown in a concentration camp' and you make that movie up in your head, it's so much better than that...and by better I mean worse. You're stunned. With most of these kinds of things, you find that the anticipation, or the concept, is better than the thing itself. But seeing this film was really awe-inspiring, in that you are rarely in the presence of a perfect object. This was a perfect object. This movie is drastically wrong, it's pathos and it's comedy are so wildly misplaced, that you could not, in your fantasy of what it might be like, improve on what it really is. The closest I can come to describing the effect is if you flew to Tijuana and suddenly saw a black velvet painting of Auschwitz...It's not funny, and it's not good, and somebody's trying too hard in the wrong direction to convey this strongly held feeling."
An example of "wrong headedness", is in a scene where Lewis is freezing in his bunk because a guard removed his blanket. He gets up, goes off screen to the latrine to urinate, and the sound of ice cubes hitting the toilet bowl is heard. Yea..I would say that's a "wrong direction" to go with this subject matter.
O'Brien and Denton felt the same way, refused to allow this version to surface, and
that's where we stand today, 34 years later. Jerry has a rough cut and a VHS copy in his vault and doesn't take interviews on the subject. He says it will be released, but when....no one knows.
And still I wait to see the legend. Like camping out to spot Bigfoot...someday I will see this classic Lewis film...this Holy Grail of Kitsch. In all it's unreal bad ideas, horrific topic, and typical Hollywood pinky ring suave martyrdom...it's still preferred viewing over any episode of American Idol.
American International Pictures


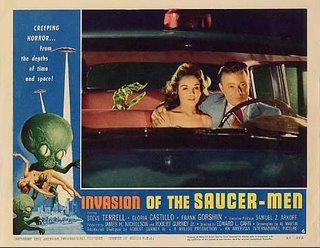
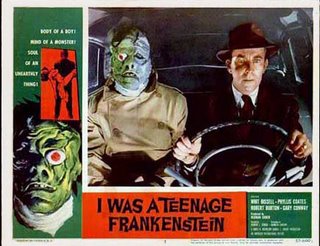
One of my all time favorite movie studios was AIP formed in the 50's. During the days of big studios trying to catch up with the newly arrived TV craze, AIP was aiming their pictures at the teenage drive-in set. AIP aimed their focus perfectly at the restless, hormonal charged teens who were getting out of the house and looking for something TV couldn't offer. Most of their more famous titles have "teenage" in them (i.e. Teenage Frankenstein, Teenage Werewolf, Teenage Caveman, etc.) or have the teenagers trying to foil some creature from space or thrawrting some villain.

(..some kind of double date, apparently...)


(Teenage Frankenstein getting a lift to school from dad. How embarrassing for him.)


(Michael Landon far from the "Little House")

The picture's sole strength, sometimes, relied on the ad campaign and ad art. Most of time, the title and art were made before a script was even written.

This site has collected a complete listing (for sale) of AIP's diverse and culturally iconic pictures from it's inception as ARC in 1954 to the almost forgotten titles of 1980.

Wednesday, March 29, 2006

Spring Cleaning

Check out my Ebay crap...Surely there's something there you gotta have!!

Saturday, March 25, 2006

This Post has 7 Blogs

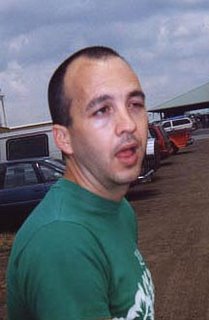
My buddy Dave has got himself a blog,
so God knows what will happen now. The dood'll rip up the joint.

He's gonna kill me for postin' that pic. (paa haaa)

Tuesday, March 21, 2006

Planet X

I'm diggin' Planet X...

Tuesday, March 14, 2006

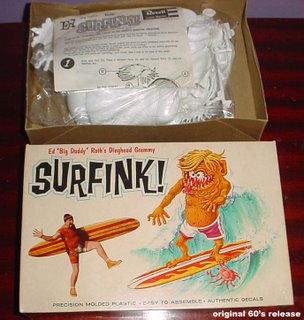
Surfink (post #150)


(...or, The Longest Post Ever to Grace this Blog or, This Was Supposed to Be a Quicky Project)
A lot of people have been e-mailing me and asking me where I've been, cause I haven't posted in a couple of weeks. I've been trying to finish this giant post. The production of this post, has been more demanding than the actual subject of the post. I kid you not.
ok....
Of all the models that I've built for myself (and sold) or have built for others on
commission, I've never been able to build Ed Roth's classic Surfink.
A few years ago I bought one finally, but had to sell it before putting it together. I got another one just recently off of Ebay and jumped on building it before I weakened and put it in storage. One of the things I didn't like about the kit is that the surf is just white plastic. I felt it should be clear, like water...so the first thing I set out to do on this kit was to make the wave clear. I'd worked with losts of different resins, but I knew the good water clear resins were professional grade and ran pretty high on cost ($60 per qrt). Castin' Craft's Clear Resin ($20) has been around for a while and I've noted on several disscussion boards that many people have had the same problem I've had in the past with this stuff. It sets up fine...but the surface remains tacky for days....months. If you touch it, you leave indented fingerprints. This dulls the glossy look and deminishes the clearity. I decided to just make a mold of the wave for now, and figure it out later.
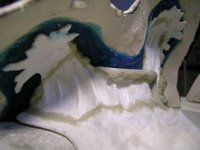
I took the original wave and glued it together with styrene glue and puttied the seams with Magic Sculp.
I decided to add more wave like shapes to the design with more Magic Sculp.


I closed off the top of the wave with a peice of sheet styrene cut and fitted to the opening.

I added more putty to help blend it in and close up any gaps, as this would let the silicone seep in when it's cast. I planned to make a "case mold" of the wave due to it's odd shape. A case mold is a two, three, or how many ever, part mold of a shape that's hard to cast with a conventionial two part, or "sandwich" mold.
I took my molding clay, Klean Klay...which has no sulfer content (a no no with silicones) and rolled out peices 1/4" thick.
I then layed this "blanket" over the shape and blended the clay where needed. The idea is to make a blanket thickness at least 1/4" all over your original. This is the shape and thickness your silicone will be later after a couple of steps. This step assures you that the silicone mold itself is thick enough uniformally.

After it's fairly uniform all over, I add keys on the section that I'll make the front and the section I'll make the back. These keys help the outer plaster jacket (that's about to go on) to stay in registration.

I then form a clay wall to help form the back half of the outer plaster mold. Once the back half of the plaster mold is brushed on, formed and then dry, I remove the clay wall leaving the front half.

I then coat the facing wall of the plaster with vaseline and lay on the other half of the plaster mold.
After that's dry, I carefully pry the back half away and pry away half the clay blanket as well, exposing the actual model. I "re tool" the exposed clay and form "registration keys" on the clay's surface.


These keys will be used to register the silicone mold edges to one another. How? Read on. I take the back plaster section and drill a large pour spout to allow the silicone to flow into it.

As you can see, the first spout was too low....the key is to get your silicone poured as high onto the actual model as possible for an even coating. I redrilled another spout and plugged the old one with clay. Next, I secured the bottom of the model with clay, as to not allow silicone to leak under it, then secured the back half of the plaster mold to the front with a large rubber band (the type use in ceramic molds). What we have is a space in just the back half for the silicone to fill. I mix up some silicone, (amount based on the clay removed from that half) and poured it into the spout. To make sure the silicone reached every area, I drilled 1/8" holes to allow air to escape. As the silicone filled up and leaked out of those areas, I plugged them with clay. Once the silicone had filled the cavity, I let it sit for a few hours.

Later, I opened the front half of the plaster mold, carefully removing the clay blanket from the front, and exposed the back half of the cured silicone mold inside the plaster jacket. I greased the facing wall of the silicone mold with Vaseline.

This keeps the two halves of the silicone molds from bonding and allows them to be opened easily. The silicone back half holds the model in registration...so, to pour the front half, I closed the front, secured it with my rubber band again, and turned the mold over.
This way, I can pour the front half of the silicone mold from the bottom without drilling a hole in the top...like filling up a cup. After a few hours, that's set and I remove the two halves leaving a complete two piece silicone mold, outer plaster case, and model.


Simple, huh?


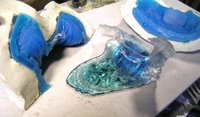
I noticed that by pouring the second half from the bottom, I got some bubbles on the surface of the waves. There was no where for the air to go. No problem, once I cast the resin, I'll dremel the bubbles and make smaller waves from them. I did a test pour of the clear resin first, to see how it would take to the mold...how much color tint to use, etc. It looked promising. It cured and came out of the mold fairly quickly. This test piece is good for testing other effects, i.e.-dremmel reactions, clear coating of differnt chemical makes, etc. I then poured the real deal. I measured out what I thought would fill the mold, gave the resin a squirt of the activator/catalyst and stirred it thoroughly.
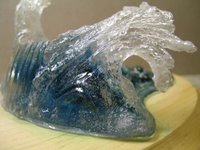
I researched the resin/catalyst ratio on line and in Castin' Craft's instructions. They spoke of drops per ounce. I've worked with resins a long time and I've always just eye balled the catalyst amount and literally measured it in squirts. The "drop" method has yeilded very slow results in the hardening of this brand of resin. Castin' Craft sells a "surface hardener" but I didn't feel like waiting to order it on line. I poured the resin into the mold, almost to the surface, then with the leftovers in the cup, I mixed in half a drop of blue green resin tint...then poured that into the mold as a final layer. I mixed the tinted with the clear to break it up, and knowing that the real ocean looks darker as it gets deeper, I kept the tops of the waves crystal clear and the base a richer blue green. I let the resin sit up and by that evening it was totally hard. As usual, the surface was still tacky, so I decided to cure out the peice with a heat gun and "force cure" the resin. I hit the base surface for about 10 minutes with the heat gun and let it cool off.


I took it out of the mold and waved the heat gun slowly over the rest for about 10-15 minutes until it was'nt tacky to the touch. I suppose you can amp up your catalyst even more for a quicker cure, but you risk the clearity going darker and even cracking of the resin. I let that sit while I tackeld Surfink himself.
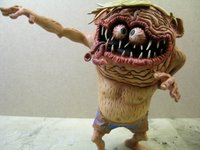
He's pretty straight forward like most of the fink models, being made up a front half and a back half . While I was checking the fitting, a fly landed on Surfink's mouth.
I took this as a sign from Ed that it was all cool. I then started taking seams off of pieces and used a trick that works for organic shaped models. I scraped the seams off of the tongue
and hands
with an X-Acto knife and then brushed a liberal amount of the Testor's styrene glue over them to melt and smooth them out.
This usually works and needs no sanding. I did a test fit of all the parts to see how the hand and arm were going to work. I never liked the way the right arm reached in front of the character.
I've always felt it should be more out to the side to give the impression that he's balancing himself. After I got that in my head, I glued the right hand to the right arm. The hand position wasn't right either, so I snapped that off and glued the hand to the wrist in a more natural position,
then blended it all with putty.
To facilitate the proper angle for the arm, I cut a 45 degree section from the shoulder
and flattened the opening with putty.
While that cured, I put the body together with Testor's styrene glue, holding the halves together with rubber bands. I went after the slightly off set seams with white squadron putty,
which is perfect for the finer seams, and sanded them smooth. I glued the arm onto the shoulder with Krazy Glue Gel and began to putty the connetction and larger seams with Magic Sculp.
I resculpted the shoulder..
..filled out the ankles, etc. I let the putty set up over night and came back to sand and blend out everything.
Another thing I didn't like about the original model was that funky hair. I liked the front...don't get me wrong. It looks just like Roth's drawing...it's the back that get's me. There are two hair lines in the back...
..one on the scalp and the one of the actual hair peice. If you lay the hair where it's supposed to be, it's just...weird lookin'. So...I cut the back half at a strategic location, Krazy Glued it in place,
then puttied on a new, more compliant hair doo.
I blended it out to the actual sculpt and added flying strands (like the front). I primed this and the surfboard with a white primer.
After the board was dried, I did a wet sand on the top and bottom and then taped the stripes off. I sprayed on the primary coat of bright yellow with Design Master floral paints...
(the same brand used in this post..and this post).
After peeling the tape away, I re-taped for the center black stripe. Once the black stripe was dried, I sprayed the whole thing with a layer of Testor's dull coat, just in case I slip while painting the red flames. If I have a slip, the yellow, white and black will be sealed and it's as easy as wiping with a wet Q-Tip to remove any unwanted red paint. The sealer keeps the acrylics from bonding and it's easy to "erase". I hand layed the flames with two layers of acrylic, giving the front end a brighter orange/red and the back a darker brick red. After that, I gave the board 5-6 coats of Plaid's Clear Gloss,
...letting each layer dry first before adding the next. I wanted a deep gloss as if the board's been painted like a car AND wet.


I go back to the wave and dremel out the bubble with a rounded bur bit.

I shape it to a lesser wave shape. I then coat this and any other surface defect or sanded seam with Krylon's Triple Thick Crystal Clear Glaze.

An extra layer of clear makes any acrylic, lexan, or lucite scratch or scar go invisible again. (as a side note: If you have a windsheild or any clear styrene that's scratched or fogged by glue, ...you can brush on a coat of Future floor wax and it will go totally clear again. With the clear resin, this is the same principal.) The triple thick glaze also kicks the shine up if there are any fingerprints.

I added the white foam with a light dabbling of acrylic paint and sealed it with Krylon's Triple Thick Glaze.


I then glued the board to the wave with 5 minute epoxy and waited for it to dry, then glued the wave to the wooden base (after painting a green shadow texture with acrylic)
with 5 minute epoxy.
Back to the Grimmy himself...once the "baggies" were taped off,
I painted a base coat of light brick red on all the fleshy areas...I even went over the eyes. I then drybrushed a slightly lighter shade of flesh over the whole area.
I say slightly lighter, because if it's too much lighter, it creates a contrasty effect and we want to work our way to highlights gradually. If the next layer of drybrush is too stark, you can make up a batch of that same shade as a wash...like a water color... and brush it all over the area. This will bring the shadows up a little lighter, but not really effect the lightest shade. On my last layer, I went with a wash
and added a smidge more pigment to lighten his belly chest and some back, to simulate a slight "farmer tan"...as if he had on a t-shirt for most of the summer. I left the inside of the mouth dark, but ran a wash of red over the lips and tongue. I drybrushed that with a lighter rose shade. The teeth got a drybrush layer of ochre, then another layer of lighter ochre, then on the tips, a brushing of white.
The eyes got a drybrushing of ochre/off white, then a final layer of white. I capped them with spots of pure black for the pupils. The veins were red washes with a fine tip brush, following the sculpted veins. The hair was drybrushed with a golden brown then a lighter brushing of golden yellow.
Here, again, the contrast was evident and I did another wash of the golden yellow to blend the shadows more. Very carefully, on the grimmy's shoulder,
I lined in Roth's logo as an old school dark green tattoo using a fine brush. I peeled the tape off and painted the shorts according to the original box art...a patch work of lavender panels.
I sprayed the whole thing with Testor's Dull Cote and glossed the mouth, tongue, and eyes with Krylon Triple Thick Glaze. I also spattered the area nearest the board with the Plaid Gloss to simulate a splashed wet look, by holding the spray nozzle half way down and allowing it to sputter. I glued him to the board using my trusty 5 minute epoxy, then turned to the small crab.
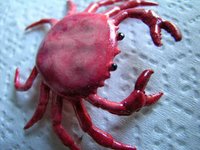
I primed him with white, painted him with pinks, and washed it with a darker red in places. I attached him to Surfink's toe with 5 minute epoxy and propped him up until it set.
Finished.


After years of planning and wanting to make the most of my first and only attempt at Surfink, I came to this final effect. I'm pretty happy with it and I'm glad I went all the way with the wave effect. If you'd like a clear wave for your Surfink kit, email me and we'll work something out.

Here's some shots of Surfink enjoying himself off the coast of Miami...
and off of Zuma Beach.
Dell Coupon
Free Hit Counters